Friday, May 29, 2009

Asparagus and Goat Cheese Omelets

Forgive me, I have taken many many photos of my tiny asparagus crop. It came up early when we had a quick burst of good weather, and then most of it proceeded to wither when the late spring snow came. Darn it! This was supposed to be my first good harvest after putting in the three patient years from putting in the seeds. I do see some new stubs pushing their way out this week, so I may still double (or triple!) my sad little harvest, but I don't expect a lot now. The small quantity made what I did get seem so valuable that I had to take lots of pictures, and then I had to think of something to do with what amounted to four stalks a piece for my husband and I, and thus two asparagus and goat cheese omelets hit the pan.

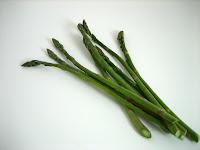
All I did was brush the asparagus with olive oil, sprinkle it with salt and pepper, and roast it for 3 minutes at 500 F. Then I folded them into the middle of an omelet with a sprinkling of goat cheese. I also topped the omelets with a bit of crumbled goat cheese because goat cheese is so tasty, that a little extra never hurts. Look at the little ends waving to me from inside, proud to have been the ones up early enough to be cut prior to the snow. I know, I need to move past this!

Read More...

Thursday, May 28, 2009

The World's Greatest Buttercream


The truly amazing texture of this icing cannot be captured on film (pixels), but believe me when I say this is the best buttercream I have ever tried. And I've tried many, because often I prefer the icing to the cake. The fact that icing one cake takes a full pound of butter just has to be overlooked in this case, I think. I found this recipe and adapted it when I was making Court's wedding cakes - one in vanilla and one in chocolate. They are both so delicious that I really have a hard time not eating it by the spoonful!

My icing job on these mini-cakes was pretty mediocre, but they were just tasting cakes for a wedding in July. This particular buttercream used 200g milk chocolate and 50g unsweetened dark chocolate as the bride prefers a milk chocolate flavour.


Buttercream:
(makes 5 cups - enough to ice a 3 layer 8" cake)
2 large eggs, separated
1/2 cup sugar
165 ml whole milk
1/2 tsp vanilla
4 sticks/2 cups unsalted butter, softened
optional: 200-300g dark chocolate, melted & cooled

For extra potency in the vanilla buttercream, adding vanilla seeds is a nice touch. If you decide to make chocolate buttercream, I wouldn't recommend milk chocolate as the sweetness tends to overwhelm the chocolate flavour. However, if you really prefer milk to dark a mixture of the two seems to work best to balance sweetness & chocolatey-ness. You can also experiment with other flavours: I have tried adding raspberry puree, Chambord, chestnut puree, and most kinds of chocolate... it's pretty much a universally good icing.

The first step is to make a custard. Put the eggs yolks and a third of your 1/2 cup of sugar into a bowl and cream together until very it becomes pale and thickened. On the stovetop, bring the milk and vanilla to a boil over medium heat; remove from the heat and whisk a third of the heated milk into the yolk mixture, then pour that back into the pan with the remaining milk and whisk together. Cook over medium heat, stirring continuously, until the mixture thickens and starts pulling up on your whisk (this will be at about 190F on a candy thermometre) - this was hard to explain, but if you've ever made custard before you'll know what I'm talking about. Remove from the heat and pour through a sieve back into the bowl, then pop it in the fridge until cool.

When it's cool, whip the butter until pale and fluffy and then mix in the chilled custard. Next, heat the egg whites and remaining sugar in a bain marie (glass/metal bowl over simmering water), whisking until the sugar is dissolved - this doesn't take long. Remove from the heat and beat the whites on high until stiff peaks form. Finally, add the egg white mixture to the butter mixture and beat together until smooth. If you are making chocolate buttercream, now is the time to add the melted chocolate and whip together until fully combined.

This buttercream can be refrigerated for up to 3 days, or frozen up to 3 months. Before icing, bring it back to room temperature and beat again.

Read More...

Wednesday, May 27, 2009

Planting Upside Down


My neighbor's daughter apparently brings guests out in the summer time to look over the fence at the crazy upside down plants. The plants belong to me. I don't know for sure where this idea came from - I have a vague recollection of seeing Jamie Oliver do it on TV, but my husband swears we saw it done when we were in Denmark. Either way, the result is a bit strange looking, but it is a great space saver, and we found that it increases our yield from pepper and cherry tomato plants. Start hanging your own upside down plants, and you too can be a neighborhood oddity and enjoy lovely produce come mid summer. This is also a great option for balcony gardeners.

It is actually very simple, and also very inexpensive. You do need to start with a plant though, so you will have to either buy a small plant, or start the seeds inside and grow them until they are about the size shown.

The first step is to go out and purchase some inexpensive hanging baskets (from Canadian Tire or Walmart), and cut a small hole in the bottom. You want it small enough that your dirt won't all fall through, but big enough that you can slip a plant through it gently.

Be very careful in feeding the plant leaves through. Try to keep the root ball intact or you will get it crumbling through the opening (Note, don't be too afraid of this happening, it hasn't happened to me yet).

Top up the basket with soil, and water so that it drips through the bottom. You will get a lot of dripping through the first few times you water, but as the plant gets larger and more established, less will drip through. In the mean time, water pretty regularly. You won't over water seeing as excess does drip through.

Having the plant up in the air means that you don't have to deal with tomatoes rotting on the ground by accident if your plant cage isn't holding it all up. Also, it is fun to see how the plant adjusts in the first few days to reorient itself to the sun.

In addition, here are some gratuitous pictures of my chives and the one onion that somehow didn't come up last year, and this year survived our late spring snowfall. Yay! My asparagus did not fare so well as I will elaborate soon.

Read More...

Tuesday, May 26, 2009

Saving a Baking Disaster


I'm sure we've all had this happen occasionally when trying out a new recipe or making one of your own. Sometimes the taste is good but it doesn't rise, or, as happened this time, they had a perfect moist texture but lacked flavour. With these fruit muffins...well, I'm not sure I would exactly call it a disaster but they were certainly too bland to eat on their own and only the masses of fruit I put in gave them any flavour at all. There was no way I was throwing these out though (waste not, want not), so I put them in the freezer and thought of things I could use them for.

I finally decided that these could make a quite good base for some kind of cake, and when Mother's Day rolled around I decided on Brown Sugar Cheesecake. The base was made by just cutting the muffins in half and squishing them down into 4 ramekins, then I poured
the batter in and baked at 350F/180C for 40-45 minutes. I made these several days in advance and put them in the freezer, then moved them to the fridge the day before so they'd be ready to go.

Brown Sugar Cheesecake (serves 4):
1 package cream cheese
1/3 cup tightly packed brown sugar
1 large egg
75g sour cream
1 tsp vanilla

I served these with the fruit topping I use on my Quickest Cake Ever, just pushed through a sieve. It was drizzled this on the plate (artistically, of course) and the cake base soaked up the syrup for extra flavour.

I also tried making mini ice cream cakes with the muffins for the base, vanilla ice cream, and the same fruit topping - delicious! In the past I've used up unrisen cake (tasty but much too dense) in a trifle as well. Just remember: cakes freeze extremely well, and if all else fails a bowlful of cake pieces and custard (or cream) and fruit can't go too far wrong.

Read More...

Monday, May 25, 2009

Adventures in Pastamaking II

Some of you may remember that Brooke and I made our first foray into the land of homemade pasta making a good while back. Well, it took some work, so we took a little break before trying our luck a second time. We used the same recipe for the pasta itself as last time but the process was quite different this go round.

For one, we used better tools. Instead of kneading and kneading, we combined the ingredients using my Kitchenaid food processor. Oh glorious invention! After combining, we could just kneed in the additional water to adjust the pasta consistency. As well, we borrowed a Kitchenaid pasta making attachment from a generous friend, and were spared the incessant whirring of our $10 pasta machine (which will likely be $10 worth of garbage as it turns out). By using the lasagna noodle setting, we rolled out ribbons of pasta that were then used to make homemade ravioli.

Brooke and I wanted to try some very different fillings this go round, and so we also enlisted the hands of another willing partner in crime, so that we had three hands going for three fillings (and then we divided them up at the end). Brooke picked a pea and sage filling, our mystery guest chose a squash and cinnamon filling, and I picked a crab, shrimp and cream cheese filling. The first two fillings were pretty much as described above (simple fillings with few ingredients). Here is what I used for my crab and shrimp filling:
- 1/2 package of cream cheese
- 1 small tin of crab meat
- 10-12 shrimp, cooked
- zest and juice of half a lemon
- 1 tsp fresh dill
- pepper to taste

Combine all ingredients in a food processor until smooth and creamy. This yielded a very lemony, dilly filling. Flavors could be decreased to simply highlight the seafood more, and the seasonings less.

All of our raviolis turned out to be quite mild in flavour, and would lend themselves well to being topped with a sauce to add some depth. For the squash version, we fried it as opposed to steaming it, which made it taste quite a lot like pumpkin pie. It would make a very interesting dessert if done larger and plated with whipped cream for a dinner party.

The ravioli making was a LOT of work, and I think I would be more likely to just go with a deconstructed version in the future (just layering pasta with filling and sauce), and passing it off as hip. It was a fun exercise though, and after the fact we came up with lots of other filling ideas. It is a good activity to do with girlfriends for an afternoon, and I would say best done sitting at a table (we had sore feet) with a glass of wine.

Read More...

Thursday, May 21, 2009

It's All Greek To Me!


I spent about four years working in the Sun Life Building in my former professional life, and in that time found a few favourite lunch spots all within walking distance. Although some of my coworkers didn't appreciate the onion and garlic breath inevitably left behind after a Greek lunch, there was a strong core of us that pledged our allegiance to a local establishment anyway and tried to frequent it at least once a month. The staff at It's All Greek to Me don't know me by sight anymore now that I work in the west end and live way out in St. Albert, but it still has to be my favourite Greek restaurant, in part due to sentimentality but in part because it still offers good value on great Greek food.

Located tucked away on Rice Howard Way, I'm sure It's All Greek often gets passed up for the more visible Cosmos located on the corner. It is a little place all done up to the nines in pacific blue and white and Greek paraphernalia. The menu is a pretty simple selection of all of the Greek stand-bys you will have come to know and love at any other Greek restaurant around the city, but don't be surprised when the "house salad" is actually a lettuce salad with the option of being upgraded to a traditional Greek salad.

I know that there will be some people that prefer a souvlaki plate done a bit differently, but I enjoy getting a lamb souvlaki (as pictured) on a nice thick pita, with a side of tzaziki (mine made with a bit of sour cream is based on theirs), roast potatoes, and a lettuce and tomato salad dressed with just an oil and herb dressing that is addictive in the way that the Olive Garden's is, despite it's simplicity. I get all of my favorites, done the way I am used to, all on one plate for under $15 at lunch. I think it gets a bit more pricey at dinner, but you get two skewers of meat instead of one.

It's a bit kitschy, but to me that just adds to the appeal. I couldn't imagine going to an "understated" Greek restaurant!

Read More...

Wednesday, May 20, 2009

Crust-less Ricotta, Tomato & Basil Torte


Recently I've been looking for recipes that will make good picnic food - i.e. they taste good unheated and travel well. I found this recipe on Taste.com.au and the picture looked so good that I had to try it. This was very tasty, but not exactly what I was looking for. Because it has no crust (gluten free!), it seemed like not the easiest thing to be packing around though it was good even cold. I would definitely make this again though! Using the food processor made it super easy to make, and there is absolutely nothing wrong with a tart basically made entirely of cheese.

Ricotta, Tomato & Basil Torte:
500g low-fat ricotta

100g feta, crumbled
3 eggs
2 garlic cloves, crushed
1 bunch fresh basil, chopped
350g grape tomatoes, halved

Add the ricotta, feta, eggs, garlic and basil to your food processor and whizz together until smooth. Pour into a 22cm/9" pan that has been greased with olive oil (or lined with parchment paper) and cook in a 375F/180C oven for 1 hour.

I didn't mess with the recipe at all this first time, but reduced it by 1/3 as my pan was smaller. I got lazy and only did one layer of tomatoes (about half what the recipe called for), but it would be very easy to tuck a second layer underneath first before adding the top layer. This was very, very cheese-y, so adding all the tomatoes would cut through the richness of the cheese.

Read More...

Tuesday, May 19, 2009

My French Sous Chef


Well, this is admittedly only marginally related to food, but it rated high enough on the cuteness scale that I decided that it warranted a post. Especially after a long weekend, I'm keeping it simple. I have a little "sous chef." Her name is Leeloo (she is the Fifth Element). Having gotten her from an Alberta Farm, I would have thought her to be just like most of us here in Canada - from random mixed European decent. Turns out, I now think she must have French ancestry. How else could one explain the fact that the only one of my plants she eats are the violets? They aren't the candied variety, but I think she must be making do. It also explains why she is most excited when I drop cheese on the floor.

Read More...

Friday, May 15, 2009

Dutch Delicious


A great heading for this post, and a great name for a bakery; it was also the theme for my Mother's Day lunch. Dutch Delicious (near the traffic circle at 13232 118 Avenue) has become a family favourite. And I'm not saying this happened to me... but don't call the bakery at midnight assuming their voicemail will give the hours, because then the baker will pick up resulting in a pretty awkward situation.

Family meals are always a struggle, dealing with the different preferences of everyone. I decided to stick with sandwiches, but do them a little differently. My family is Danish so we're big on the open-face sandwich, and I also love the breakfast spreads you see in the Netherlands (the picture to the left = best breakfast ever). I tried to combine the two, and put out a platter of dif
ferent breads (whole wheat Dutch and light rye), deli meats (porchetta, capicolla, peppercorn turkey, and sausage), hard-boiled eggs, and cheeses (medium gouda and mozzarella) from Dutch Delicious, the Italian Centre Shop, and Sobey's. I set out little bowls with dijon and wholegrain mustards, and also had crudités with dip. For a Mother's Day drink I made Pimm's Cocktail filled with fruit (with a virgin version for Court made with strawberry juice & sparkling water). Basically, this was just a fancied-up version of our normal weekend lunches. For dessert I made Brown Sugar Cheesecake and Court brought over some of her Vanilla Cupcakes for those crazies who don't eat cheesecake.

Now, back to the bakery. They have a small deli and cheese section and the rest is breads, buns, cookies, and small pastries. They also have a cute little table where you can eat in if you like, and I saw a few people doing that when I was there at around 9:30 on Saturday morning. It's best to get there early, as the best picks are gone by lunchtime. They make delicious almond cookies and almond tarts - so delicious that I haven't branched out much from those. If you like ginger the ginger tarts are also very good. They also have a very large selection of imported grocery items from the Netherlands, including my favourite: chocolate sprinkles (chocoladehagel - as seen in the picture). I also buy my dutch rusks there (I'm addicted) as well as good pickled beets and a lot of other harder to find foods if you're interested in Dutch, Scandinavian, or German cuisine. I still don't know the hours, but I do know that they're closed on Sundays.

Read More...

Thursday, May 14, 2009

Vanilla Cupcakes for Mother's Day


What do I think of when I think of Mother's Day? Flowers! This year my sister was on cooking duty, and I just had to worry about dessert and flowers for mom. While I did get her a bouquet of flowers, I figured I would incorporate some edible spring flowers into dessert as well. I made pretty little vanilla cupcakes, with a very vanilla buttercream frosting, and topped them with some pastel sprinkles and johnny jump ups that keep coming up through the rocks around my fire pit (I can't weed them out, they are too cute). Pretty, girlie, and delicious!

This recipe comes from Billy Reece, owner of Billy's Bakery, NYC

Billy's Vanilla, Vanilla Cupcakes
Makes about 30 cupcakes

1 3/4 cups cake flour, not self-rising
1 1/4 cups unbleached all-purpose flour
2 cups sugar1 tablespoon baking powder
3/4 teaspoon salt
1 cup (2 sticks) unsalted butter, cut into 1-inch cubes
4 large eggs
1 cup whole milk
1 teaspoon pure vanilla extract

1. Preheat oven to 325°. Line cupcake pans with paper liners; set aside. In the bowl of an electric mixer fitted with the paddle attachment, combine flours, sugar, baking powder, and salt; mix on low speed until combined. Add butter, mixing until just coated with flour.

2. In a large glass measuring cup, whisk together eggs, milk, and vanilla. With mixer on medium speed, add wet ingredients in 3 parts, scraping down sides of bowl before each addition; beat until ingredients are incorporated but do not over beat.

3. Divide batter evenly among liners, filling about two-thirds full. Bake, rotating pan halfway through, until a cake tester inserted in the center comes out clean, 17 to 20 minutes.

4. Transfer to a wire rack to cool completely. Repeat process with remaining batter. Once cupcakes have cooled, use a small offset spatula to frost tops of each cupcake. Decorate with sprinkles, if desired. Serve at room temperature.

I only got about 24 cupcakes out of this and I had to bake them for 25 minutes, so clearly I filled mine fuller than Billy does. I say the bigger the cupcake the better!

Billy's Vanilla Buttercream
Colored sprinkles, for decorating (optional)Makes enough for 30 cupcakes

1 cup (2 sticks) unsalted butter, room temperature
6 to 8 cups confectioners' sugar
1/2 cup milk
1 teaspoon pure vanilla extract

1. In the bowl of an electric mixer fitted with the paddle attachment, cream butter until smooth and creamy, 2 to 3 minutes. With mixer on low speed, add 6 cups sugar, milk, and vanilla; mix until light and fluffy. If necessary, gradually add remaining 2 cups sugar to reach desired consistency

I made a half batch because I was only frosting half the cupcakes (the rest hit the freezer), but I still used the full amount of vanilla, because vanilla is tasty.

Read More...

Wednesday, May 13, 2009

Fentiman's - A Grown Up Soda

With our amazing contact (singular) in the food industry, Court & I were lucky enough to receive free samples of some sodas that have just recently entered the North American market. I have seen it available at Sobey's Urban Fresh, but am not sure where else it's sold. Their North American website has more information on availability and the British website has a little more information in general on the drink itself. We received the samples a couple of months ago, but with our recent busy schedules and a baby on the way the tastings had quite a large gap between them. We started out checking out the press pack that we were sent, and it was clear from that that these are marketed as an adult beverage. After trying them out as mixers I'd have to agree - these sodas are good, but they really stand out in cocktails.

Our first tasting was done with at an impromtu dinner party with some friends, trying them straight for the first time. The results were as follows:
Victorian Lemonade - had mixed reviews, if you like natural lemonade you'd like this as it's strong and quite tart, most thought kids would not love it and that it might be good as a mixer
Mandarin and Seville Orange Jigger - generally liked, fresh, like Orangina with a hint of ginger
Dandelion & Burdock - mixed reviews, three liked it the best the other two did not like it at all, very licorice-y like Ouzo and Sambuca
Shandy - generally liked, a bit refreshing and similar to a light beer
Ginger Beer - so much ginger it tastes spicy, potent!, feels like it should be mixer
Curiosity Cola - smells and tastes like coke bottles candy

The second tasting was just me and my brother Norm (Court's husband). I came over assuming we would do a similar tasting to last time, only this time with alcohol... but it turned into a pretty drunken night as each taster was a full size high-ball. We started off with the Ginger Beer; while it had seemed too strong to drink plain, it was excellent in a Moscow Mule (2 parts Ginger Beer, 1 part vodka, 1 part lime or lemon). We each had a couple of these, and they were potent but delicious and refreshing, and would be perfect in summer. Next up was an Arnold Palmer (2 parts Victorian Lemonade, 2 parts iced tea, 2 parts vodka) and after that a modified Tequila Sunrise (4 parts Mandarin and Seville Orange Jigger, 2 parts tequila), both of which worked well. I would not recommend using saskatoonberry syrup in your Tequila Sunrise as a substitute for grenadine, however. After that, my notes get (understandably) a little messier. I know Norm started drinking a mix with the Dandelion & Burdock and said it was very good, and I was drinking Curiosity Cola and Crown Royal which was also good, if a bit too sweet. A good night with good drinks - and no hangover the next day!

Finally, to accompany the Mother's Day lunch I had I made one of my favourite drinks - Pimm's Cocktail. It's made with 2 parts Victorian Lemonade, 1 part Ginger Beer, and 1 part Pimm's; added to that are slices of strawberry, lemon, cucumber, and oranges (I used a mixture of navel and blood). For a 1 litre jug, use 400ml lemonade, 200ml ginger beer or gingerale, and 200ml Pimm's. This is the perfect summer drink and was a big hit. Pimm's however, is very difficult to find in Edmonton. If anyone knows where you can get it, let me know! I had to pick up my current bottle the last time I was in BC.

Read More...

Tuesday, May 12, 2009

PB Marshmallow Squares: Not Just for Kids


This is a retro favorite of mine. I was a huge peanut butter lover growing up, and still am. Upon graduating from University, I made and brought in some peanut butter marshmallow squares to my first job on my birthday because the rule was that on your birthday, you brought in treats. After that, a week before my birthday would hit again I would start getting everything from casual requests to out right demands that the squares make a repeat appearance. I was always happy to oblige seeing as these are pretty much the easiest dessert I make!

PB Marshmallow Squares:
1 pkg butterscotch chips
1 cup smooth peanut butter
1/2 cup butter or margarine
Marshmallows to your taste (usually less than a small bag)

I love the flexibility of this recipe in that I can randomly alter the proportions of peanut butter, butterscotch chips and marshmallows to taste, or based on what I have or how big of a pan I want to make. The above is usually about right for a 9 by 9 pan, but I sometimes make thick ones in an 8 by 8, or bump up the quantities by a bit to fit a lasagna pan.

To make the squares, melt the first three ingredients on low heat stirring constantly to avoid burning on the bottom. This only takes a couple of minutes. Take your pot off the heat and let it sit until the outside of the pot is cool to the touch. This is key to make sure that the marshmallows don't melt when you stir them in, and also to make sure they don't all float up to the top when you pour it into the pan. I like mine to be absolutely packed with marshmallows, so I keep adding them until no more will coat. Finally, pour the mixture into a pan that has been lined with wax paper, and smush it down with a spatula so that it is all even. I usually have a little of the pb/butterscotch mixture at the bottom to drizzle over the areas that look like they might have air gaps between marshmallows.

Pop the pan into the freezer to solidify quickly, and once an hour or so has passed, they are ready to be cut into squares. I store mine in the freezer and just take them out about five minutes before serving. My husband likes to eat them right out of the freezer because then the marshmallows are all crunchy. Cut them tiny because they are addictive, and stopping at one or two is very difficult.

Read More...

Friday, May 8, 2009

Gardening Part 2 - You can't grow everything

The summer is such a great time for foodies up north. Not only can we grow fresh food if we choose, but if we don't, we can still get farm fresh products to use in our cooking thanks to local farmers markets. There is one link that I use all the time, because not only does it show the markets, but they are mapped, and their hours of opperation are listed as well. Check it out here.

It adds in the summer markets as they begin opperation, and it even lists upcoming markets that are open through the winter, so you can use it year round. Clicking on each pinpoint will provide you with additional market information. I will be adding this link to our sidebar under Edmonton Resources where the big restaurant list is, so use it often!

Read More...

Thursday, May 7, 2009

Get Them While You Can!


I stopped by the Italian Centre Shop after work to pick up some harder to find things for the Mother's Day lunch I'm having, and when I saw these fresh almonds I had to buy them. I had no idea how to eat them and in fact had never even heard of them, but strange produce is irresistible to me. Anyway, it was cheap: only $0.35 for the large handful I bought. When I got home and googled them it seems you can eat them whole. Not for me! The fuzzy outer skin is too off-putting (I have the same trouble with peaches), so instead I cut them open and ate the small almond inside. As it is just forming, the centre has sort of an almond jelly in it, and the overall taste is sharp and fresh - kind of like the smell of fresh cut grass. If you're interested, head over soon as from what I've read these have only a short season of a few weeks.

Read More...

Wednesday, May 6, 2009

Risotto For Beginners

I used to be afraid of making risotto. Watching Hell's Kitchen had convinced me it must be a terribly complex dish of the kind that could reduce professional chef's into quivering tearfilled balls of goo. That was a misconception. Making risotto is incredibly easy (I wouldn't lie to you), although perhaps more difficult when doing it in bulk and partially cooking it prior to a restaurant shift. Just to be sensitive to the poor Hell's Kitchen contestants I will say that making risotto at home for personal consumption is easy peasy, and certainly worth trying. For me it is now a winter meal staple, both as a meal in itself and as a side. I can make lots and serve it for a dinner party, or I can use it to use up tasty leftovers (like pasta). I just love the creamy carby goodness, and that it tastes like it is made with buckets of cream when really there is no cream to be found in the recipe!

Spinach and Goat Cheese Risotto (as a large meal for 2-3):
1 cup Arborio Rice
1 half an onion, finely chopped
2 tbsp olive oil
4-5 cups of chicken stock heated to boiling
1/4 cup white wine (optional, but nice)
about 2 cups of loosely chopped spinach (or as much as you like - this is where you could put in anything you want to flavor with, squash, mushrooms, chicken, asparagus etc. but if it should be precooked unless like the spinach it will wilt by being stirred in for 1-2 minutes)
2-3 tbsp of crumbled goat cheese
1/4 cup grated parmesan

Heat the oil in a large deep pan, and saute the onions for 2-3 mins (until clear). Add in the rice and stir so it is coated in the oil. Cook it in the oil for 1-2 mins. Add the wine if you choose and stir until it is absorbed. Start stirring in the stock about 1/2 cup at a time and continue to stir with a spatula as the rice absorbs the liquid. Stirring is the magic in risotto. It keeps the rice from sticking to the bottom and lets all the starches come out to create the "creamy" effect. You don't have to stir the entire time, but most of the time is advisable.

The tricky part is that you have to taste the risotto to know when it is getting close to done. I would say that in my house, with my stove, I end up taking 20-35 minutes just depending on how high I have the heat. You will know it is close the way you know pasta is (no, not by throwing it at the wall), in that it will still have a bit of firmness, but no longer be crunchy. Think of it as rice al dente. When you feel like it will need only one more addition of broth, put your flavoring agents in so that they warm up and get nicely mixed in. Finally, when the last of the liquid is absorbed, stir in the parmesan to take the creaminess over the top.

Oh delicious comfort food! How would we make it through 6-8 months of winter without you?

Read More...

Tuesday, May 5, 2009

Beef & Leek Udon Soup

This soup is so quick and easy to make that I seriously made it before work this morning. It's about 15 minutes from start to finish, and that's including boiling and chopping time. The only thing that needs to be made in advance is the kaeshi, but that can also be purchased at most asian grocery stores - I usually have it on hand all summer, as soba is one of my favourite quick summer meals. I am looking forward to a tasty and healthy lunch today!

Beef & Leek Udon Soup (serves 2):
200g dried udon noodles
1 tbsp vegetable oil
150g beef, sliced thinly
1 leek, thinly sliced diagonally
1 inch chopped fresh ginger
50 ml kaeshi
600 ml water
2 tbsp miso
pepper

Bring a pot of water to the boil then add the udon noodles and cook for 6 minutes. Empty the noodles into a sieve and run through cold water, then set aside. In the same pot, heat the oil and saute the beef and leek for a couple of minutes, then add the ginger, kaeshi, and water. Slowly mix in the miso, ensuring there are no lumps, then add the noodles and heat for another 2 minutes. Once the miso is in, make sure the soup does not come to a boil.

This makes 2 generous servings, and you can top with pepper to serve.

Read More...

Monday, May 4, 2009

Caramel Nut Brie


I will confess, this is not my brie. It's actually some brie a girlfriend of mine made for our book club, but my pictures of hers looked more delicious than the pictures I took of my own. No skin off my back though, I still got to make it myself and eat a very large amount of yummy cheese all on my own. Good brie recipes abound in my kitchen. I am in a couple of book clubs, and brie seems to be a staple on the snack list, so I have a very extensive knowledge of great ways to serve brie.

In my mind it comes down to these four classifications: baked or not, encased in pastry or not, and sweet or savory. I love them all, so I try and give each of them their fair share of attention. I am sure many of you are familiar with the brandy nut brie recipe in the Best of Bridge cookbook series. I was actually given the entire set one Christmas as a gift (an excellent gift!) by my mother. The brandy nut brie is one of my favorite ways to serve brie, but the one difficulty for me is that I don't regularily have brandy on hand, so it seems like every time I make it I make a special trip to the liquor store to pick up an airplane sized bottle of over priced brandy.

This brie actually tastes quite similar (brandy combined with a pile of brown sugar ends up being kind of caramely), but is an easier make for me because I like to keep caramel sauce on hand for ice cream. To make it, pop a wheel of brie into the oven at 350 for about ten minutes (just so it gets warm and a little melty), and then top with either walnuts or pecans and some caramel sauce. It doesn't get easier than that. On top of being delicious, it makes for a beautiful presentation served on a nice little plate with caramel dripping into the cheese as wedges are cut.

This is a great little appetizer to put out at a party, but can also double as a dessert/cheese plate type dish for a dinner party if you want something sweet and decadent to finish a meal, but don't want to do up a full dessert course.

Read More...

Friday, May 1, 2009

Happy May Day!

It finally feels like spring is here, and I am ready to get some stuff in the ground. Since it feels like forever since I started planning the garden and started off the early-sowers, I'm pretty excited to get digging. The garden plan above is the result of my research on companion gardening and crop rotation (thank you Edmonton Public Library!), and will hopefully increase quality and yields this year.

The prep work for gardening is really the worst part - I don't like getting the soil ready or sowing seeds, but I am willing to put up with it for the quality of produce that results from it. It also means you save a lot of money - not only in the summer months, b
ut all year round. Once everything starts producing the majority of your vegetables are removed from your food bill, and you can extend these savings into winter by making use of cold storage, blanching & freezing, and canning. Last year we mainly did the blanch & freeze, but Court and I are excited to try canning for the first time later this year.

A couple of weekends ago we got the first batch of seedlings from the early-sowers separated and moved to deeper trays, and started the second batch. I kind of look on last year's garden as a trial version, because we just threw some seeds in and went for it. We had a disaster (daikon radish) and some poor yields (potatoes), but it mainly went really well. Unfortunately, due to lack of planning we had half a row of green onions and 15 heads of romaine lettuce all ready at the same time. Hopefully, most of the bugs will be worked out for this attempt, and the successive planting should result in delicious fresh vegetables all summer long.


Read More...